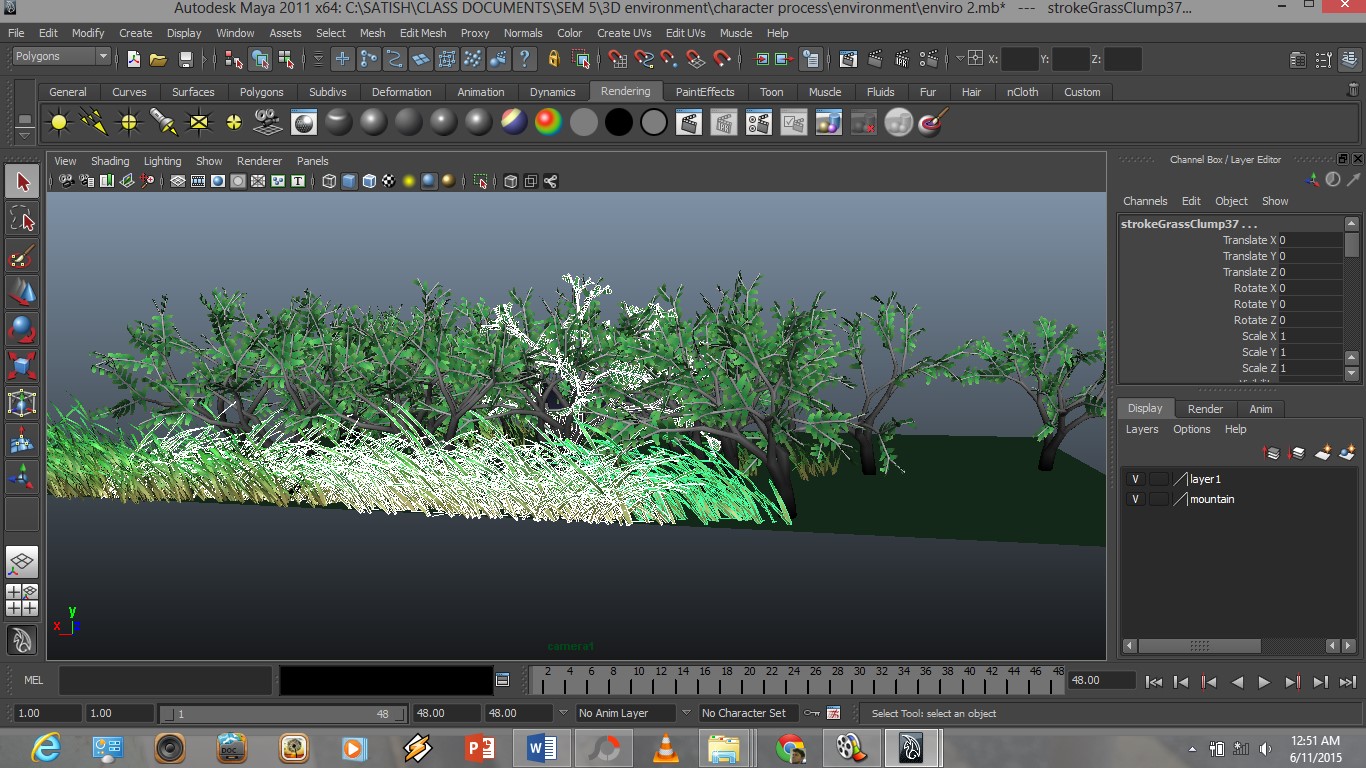
After creating an environment for my topic, it was very difficult to work on it but still i managed as i could.
Environment outcome:
Showing posts with label 3D Character and Environment Design for Animation. Show all posts
Thursday, November 5, 2015
3D Character and Environment Design for Animation
Work compiled video
video of 360 degree of character and working progress of animation task from begining
This video is not just for the skill development and revealing the work progress as what we have gone through.
3D Character and Environment Design for Animation,
Character
Process and 360 camera
These are all ny character rendered in Png file.
Process and 360 camera
![]() |
| 360 captured in a single side |
![]() |
| 360 captured in a single side |
![]() |
| 360 captured in a single side |
![]() |
| 360 captured in a single side |
![]() |
| 360 captured in a single side |
![]() |
| Lighting |
![]() |
| 360 captured in a single side |
![]() |
| 360 captured in a single side |
3D Character and Environment Design for Animation
3D Print
After completing all, we are required to print the character in 3D, so the character are printed to represent of what we have done, My printing was a failure at the first. These is the image:
This printing failure might be because of the polygons that is merged all into one. This might be very heavy for the printer to read,
3D Character and Environment Design for Animation,
Lighting (Character)
Before starting the environment in Maya, we are required to play with lighting on the character. This will help us to place a lighting tool according the scene that we have done. This practice is to see how we understand the importance of lighting for an object.
Thursday, October 15, 2015
3D Character and Environment Design for Animation
Production
Next on my modelling process was the details such as face.
Eyes and mouth were modelled by using the box polygon tool. Vertexes and edges
were adjusted to get such a shape as an eye. Then for the other eye, it was
reflected too. The mouth were modelled by extruding the polygon face in to
create a mouth shape.
After successfully completing imaging process of my
character, now it’s to be moved on to the MAYA 3D modelling ware. The Jpeg file
that is imaged from Ai are attached on the grids in MAYA. Then polygons were
used to model and adjust the shapes with the help of scale and move tools. The
polygons are selected according to edge, vertex, face and multi on most of the
time during this process.
First in modelling my character, I started from the hat by using
the cylinder polygon. It were scaled and the edges were dragged to fit the
reference image of Ah Soon.
Moving to the next one, I started with the body by modelling
cylinder polygon too. The process were the same as how the hat were modelled.
To make a perfect and equal character, I decided to make one
side of the character first. To make it as a full body, I reflected it by using
mirror tool.
After finishing the body modelling, I moved on to model the
leg with the boots. The leg were modelled from hip to knee then the boot were modelled
by remodelling the sphere and cylinder polygon.
Then the upper part of leg merged with the boot by using
vertex merging tool. Before merging them into one part, both object were
selected and combined in mesh tool.
Next, was the head. Sphere polygon tool were used for the
head. Edges were realigned and dragged to fit the Ah Soon character.
After modelling the head, body, leg, and boot, all those
parts were combined by mesh tool.
This modelling task is a challenging task for me and I have
not completed yet. This task has helped me in improving my skills of modelling
a 3D character. Moreover, the basic skills that I learnt from the previous
semester were helpful too.
Tuesday, September 29, 2015
3D Character and Environment Design for Animation
Production
A character imaging process’s most important part is to
illustrate the character details consistently. Thus, ruler lines dragged into
the work space to align all the additional parts according to the line and
proposition.
This is a tip learnt in the previous semester in making a 2D
character. Moving on to next, image plan is essential to be placed in MAYA
Autodesk before steeping into 3D modelling. Front, side, and back are the basic
need of 2D imaging. Top view is the least, but not on certain project. In this
case, these three (front, side, back) view is very important. So, I’ve imaged
three plan view of my character Ah Soon.
Finally, each of the view were split individually. This will
make the grid image on MAYA to be attached easier and side by side. These are
the JPEG files of my Ah Soon character.
![]() |
Ah Soon Character front view |
![]() |
| Ah Soon Character side view |
Other than all this skills, a reflection of this task is the
practice of the tools and learning more about Ai. This benefits more and more
on the imaging methods and self-skills in using all this applications.
Saturday, September 26, 2015
3D Character and Environment Design for Animation
In 3D, camera angles are another essential point of
consideration. This is due to the angles that would make a scene perfect. Most
of the movie Industries, involves various camera angles even in a single scene.
It is a reason of successful scene is captured. It is said so because : (in a
movie, an audience would like to watch a scene from various angle by imagining
that they are In the scene as an invisible eye, this would be the best to be
way given for the audience well).
Task :
In a group of two, take shots in five different angles.
In this task, my partner was Samira Jamali. We are required
to take pictures of partner from different angles at least 5.
Medium shot
-A shot where the subject(s) is shown from the knees up.
Full shot
-A long shot that shows the subject’s full body from head to
toe
Close shot
-A shot which shows the subject from head to mid waist
Close up
-A shot of an isolated part of the subject or an object such
as head or hand
Extreme close-up
At the end of this task, I have understand how to consider a
shot according to the subject’s reaction, movement, situation and environment.
Interactivity is another point of consideration here for this task. Besides,
the angles and environment shots determine the best viewing point for the
audiences. This camera angles brings special quality on the shots and the
subject or the object.
Subscribe to:
Posts (Atom)