Monday, December 28, 2015

Industrial Training

Week 4 (21 Dec – 25 Dec)


At the beginning of week 4, a requirement of a banner to be designed were requested due to the new shop and place of the company. The instruction were given is to be simple, spacious, theme coloured (red and black) and summarised details of the services of the company.
Firstly, the banner was planned to be white in background with black and red lines to maintain the theme colour.


Other than those lines, the company logo placed at the top left of the banner. The top left angle selected because to show the title of the banner which is the logo of the company.


After that, typeface of services and type tee shirt printing to be placed on it. This is as the requirement of the supervisor.


After aligning the typeface correctly in place the banner need some inspection of supervisor for critic and additional details. This banner design was never bothered and the supervisor designed a different banner which is very similar with this.


Pre-production processes were worked while designing the banner. Mostly, pre-production as printing the I-dot paper, vinyl cutting, measuring tees, and peeling vinyl and i-dot papers were the majority worked on.


Sunday, December 20, 2015

Industrial Training

Week 3 (14 Dec – 18 Dec)

Designing flyers
Since having a discussion in a group with all 4 members of the company, a flyer design were required by the employer for distribution around the town of Kajang. First of all, I started collecting some pictures of the previous works of the company to be included in the flyer. Then by the idea of attaching some previous work with some fonts and some printing service, I sketched one idea based on the requirement.


Sketched flyers initial idea (accepted)


While handling all the pre-production processes, in between started to work on designing the flyers design in Adode Illustrator. First of all, I tried to attach the accepted sketch into Ai to get as what have planned.


This is how I started designing the flyers. Moving on it, design process by placing a textured background design for the flyer.

Red textured background

Then, fonts and promotional typefaces as planned.

Typeface placement


Previous work advertising


Caption box placement


Including the services and type of products.


Almost at the completing stage.

While running the initial pre-production for the other clients and designing the flyers. This idea was rejected (no reason). Different type of flyers are started to be designed by the supervisor. Continued settling customer’s orders and pre-production works as usual.


Friday, December 11, 2015

Industrial Training

Week 2 (7 Dec – 11 Dec)
Hotspot printing company uses two main types of quality of shirts. One is 160 Gsm meanwhile the other is 180 Gsm for the round neck tees. Collar t-shirts are called polo t-shirts. This is because the economical brand that is used for client/customer’s requirement. Polo tees are usually at 190 Gsm.
Empiric is the tee brand used in this company for round necks. They come in purple, orange, white, pale pink, blue, yellow, green, pink, apple green, brown, red, aqua blue and black. These type of tee are available in both short and long sleeves.


Other than knowing all these qualities and working processes, handling the works such as attaching the design in Cameo Silhouette desktop driver and cutting it in Cameo Silhouette cutter. Other than that running work such as peeling the vinyl off are the works that included in my routine. Besides, running the company’s pre-production is the main responsible now. It takes more than an hour to settle one order of t-shirt at the count of 5 pieces. The more quantity of orders, the more time taken to run the process. Conclusively, one day work of pre-production might go up to 8 hours.

Conclusion

This whole week in this company is about working on the pre-production which is the initial process of running the printing services. Other than all these work, managing and writing order sheets are included in the pre-production task.

Saturday, December 5, 2015

Industrial Training

Week 1 (31 Nov - 4 Dec)
           
          
First day duty in Hotspot Printing was to learn about the materials and the procedures of designing and printing on t-shirt. Basically, in this company, there are two main methods used for printing on t-shirts. They are heat press (vinyl), silk screen (fabric paint) and paper transfer (i-dot paper). Silkscreening process are not usually performed in the company. It is taken to head branch which is in Cheras.

Type of materials and methods of production

Vinyl


I-dot paper

            Vinyl are usually used to cut by a cutter called Cameo Silhouette cutter that cuts according to the Silhouette drive application. On the other side, the paper transfer process are similarly done but in additional process it has to be pattern printed on the i-dot paper before cutting it using the Cameo Silhouette cutter.


Vinyl cutting progress using Cameo Silhouette cutter

Moving on to I-dot paper, they are printed before cutting it in the Cameo Silhouette cutter. This is to avoid the pattern to be overprinted on the I-dot sheet.


I-dot printing


The cutting process of I-dot paper are similar with the vinyl cutting process which by Cameo Silhouette cutter. Depending on the design that is printed on the I-dot paper, specific type of design no involvement of Cameo Silhouette cutter. As an example design such as logos and shapes with fixed design in it.


Before (left) and after (right) of I-dot cutting on printed paper


After printing and cutting all the design and patterns, these two type of papers are peeled off from the protective sheet and heated on t-shirt to stick it permanently by a manual machine called Heatpress Machine.

Continuing on the introduction of the company, the management has planned to shift the company to Kajang and the introduction of the materials and the processes were stopped till there to the end of the week one.


Thursday, November 5, 2015

3D Character and Environment Design for Animation,

After creating an environment for my topic, it was very difficult to work on it but still i managed as i could.

Environment outcome:


3D Character and Environment Design for Animation,

 Environment   (process )


This is the progress of making my environment.


3D Character and Environment Design for Animation

Work compiled video

video of 360 degree of character and working progress of animation task from begining


This video is not just for the skill development and revealing the work progress as what we have gone through.


3D Character and Environment Design for Animation,

Character 

Process and 360 camera

360 captured in a single side


360 captured in a single side


360 captured in a single side


360 captured in a single side


360 captured in a single side


Lighting

360 captured in a single side


360 captured in a single side


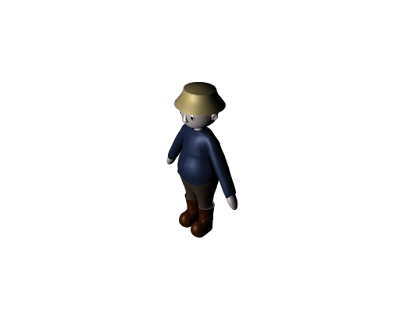
These are all ny character rendered in Png file. 

3D Character and Environment Design for Animation

3D Print

After completing all, we are required to print the character in 3D, so the character are printed to represent of what we have done, My printing was a failure at the first. These is the image:


This printing failure might be because of the polygons that is merged all into one. This might be very heavy for the printer to read,

3D Character and Environment Design for Animation,

Lighting (Character)

Before starting the environment in Maya, we are required to play with lighting on the character. This will help us to place a lighting tool according the scene that we have done. This practice is to see how we understand the importance of lighting for an object.


Interactive Design for Games and Web Applications,

After developing the ideas for my Game in scratch, I have started to develop the game in Scratch with the knowledge that i had during the Scratch exploring.


In my game, the character will have to being clicked and the activity that wanted to be done. These are the screen shots of my game building :


These are the screen shots of all my process in making a game. During this semester, since i have been lacking, i had not enough time in creating my game,so, for now, i have to make one level that recovers all my topic of the game plan. There are some place where I couldn't not fgure the exact coding for the sprite.


This is the character in my Game: